Augmented Reality Setup
Augmented Reality allows you to visualize the real-life environment with a digital magnification overlay, being a highly visual and interactive method.
The present section serves to explain in a simple way how users can map the elements that will be visible during the execution of the processes.
Whether you are mapping on mobile devices or augmented reality glasses, the mapping process will always be divided into two steps:
- Create Anchors: Anchors need to be created first as they are responsible for identifying all markers within 3 meters.
- Create bookmarks: Once the anchor is created, we can create bookmarks to link to sites or elements. Markers are augmented reality representations of where locations or elements are in space, and mentioned, need to be within 3 meters of the anchor.
Mapping on mobile devices (mobile phones or tablets)
Before starting to map the space, it is important to verify that the device used supports the Augmented Reality functionality. If you haven't already checked this point, see the Compatible Device List here.
To access the Augmented Reality mapping functionality, it is necessary to enter the application and log in. Once in the application, the user must enter the general tab and then select "AR Mapping".
Create Anchor
To create the anchor, follow the steps below:
- Click the “+” icon to enable anchor and bookmark creation options
- Click on the anchor icon, when you do, the anchor symbol will be visible at the top of the screen
- Select the position where the anchor will be located
- Confirm the position by clicking on the confirmation icon
- When confirming the position, move the phone until the mapping is 100% complete
- When it finishes loading, the anchor will change color, and will change from green to yellow.
When the anchor turns yellow, the anchor has been successfully created.
Create Bookmarks
To create bookmarks, follow the steps below:
- Click on the “+” icon to enable anchor and marker creation options
- Click on the bookmarks icon
- Select the element you want to assign to the marker
- With the element selected, click the link to marker
- When selecting the element, tap the screen to indicate the position where the marker will be located
- When the position is chosen, the marker will be visible.
HoloLens 2
To access the Augmented Reality mapping on Microsoft HoloLens 2, you will have to be logged in to the platform. After that, you will have to use the manual menu to select the AR mapping.
Create Anchor
The anchor is responsible for identifying an area and creating all proximity markers. It is the first step in the mapping process. To create an anchor, you must follow these steps:
- Click create anchor
- Position the anchor in the desired location
- Confirm the position using the hand menu
- Move the HoloLens 2 by mapping the area until the anchor recognizes all surrounding objects
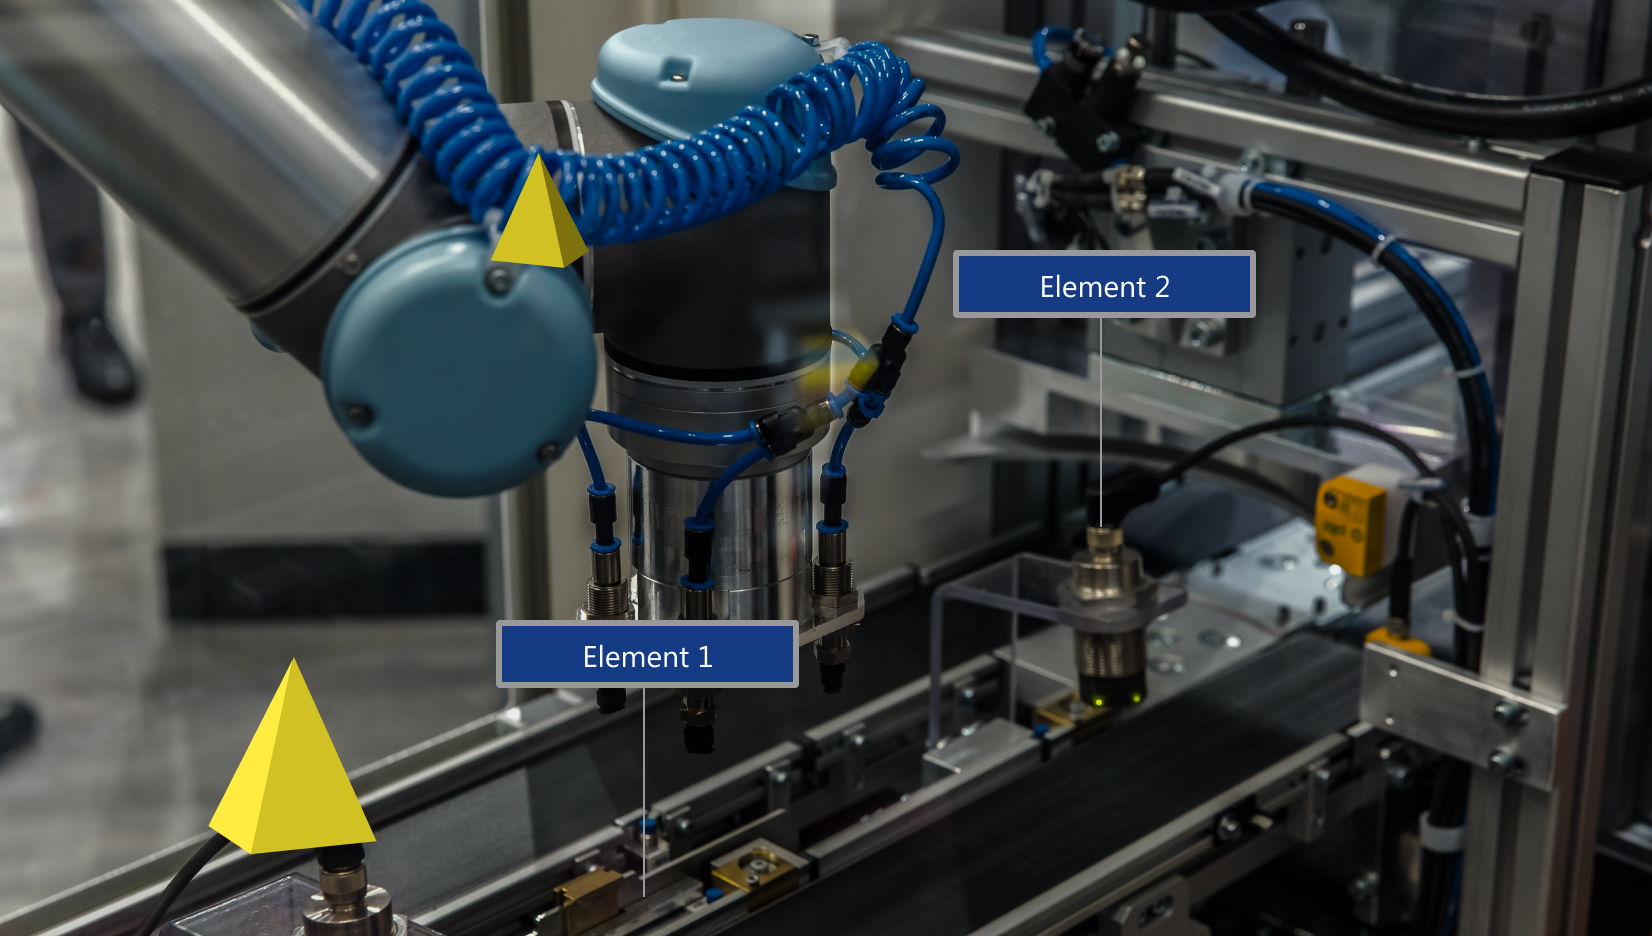
Once finished, a confirmation message will appear to indicate that the anchor has been created and the anchor will change its color to green.
Create Bookmarks
Bookmarks are augmented reality representations of the website or elements created on the platform. To create bookmarks, the user must first have created the site or elements on the platform.
If you haven't created your sites and elements yet, you will have to. You can consult our Website Design Guide, Process Elements and Templates.
To create bookmarks follow these steps:
- Log in to the platform
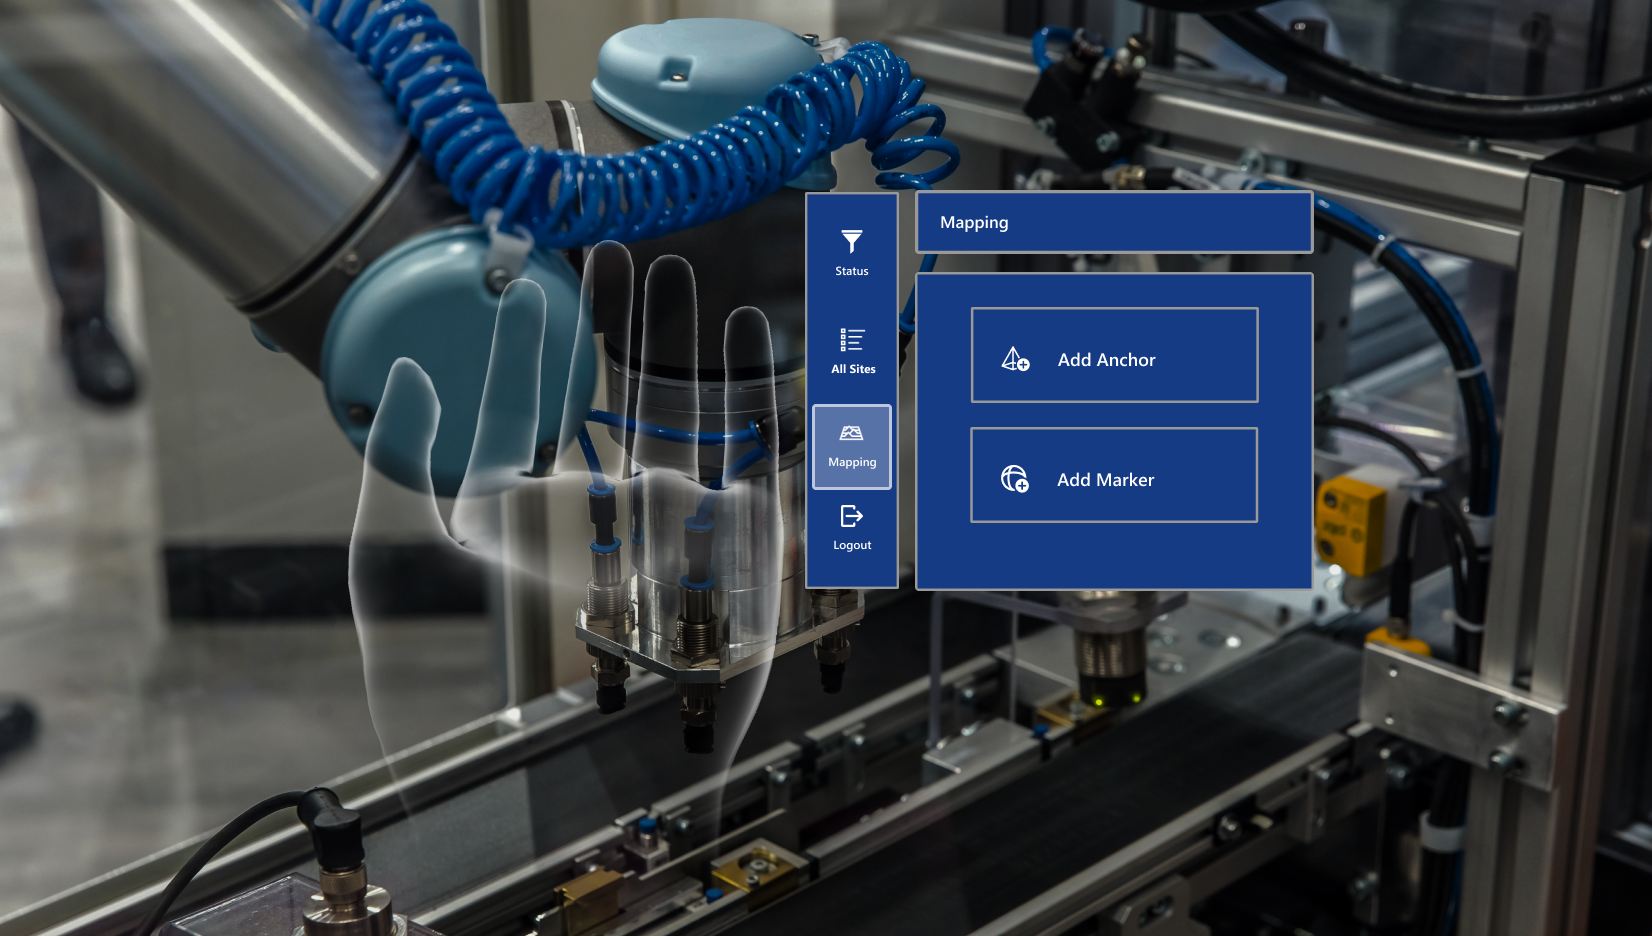
- Select AR Mapping from the manual menu
- Click on create bookmarks
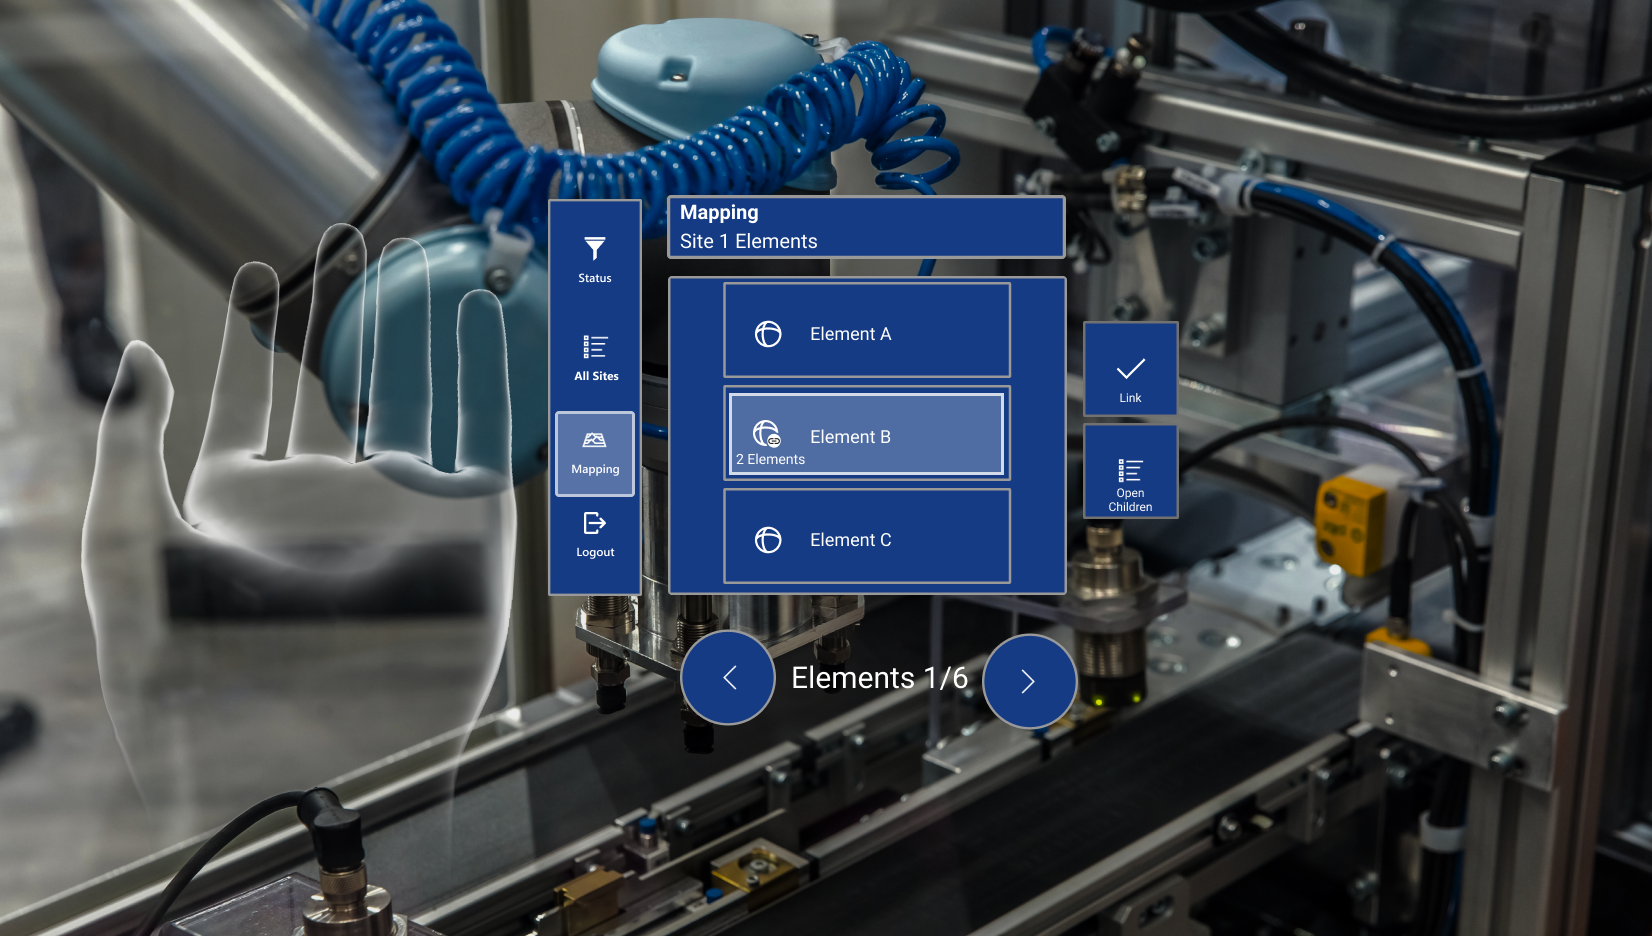
- Select the site or element you want to create the representation
- With the site or element selected, click on “link marker”
- Position the anchor in the desired location
- Confirm the position using the hand menu
As mentioned before, the markers must be within 3 meters of the created anchor. If you follow the steps correctly, a confirmation that the bookmarks were successfully created will be displayed.