Open Issues Introduction
Access, manage and create open issues
The open issues are activated by the user as needed contrary to the scheduled issues that are triggered according to a previously configured frequency.
Access an Open Issue
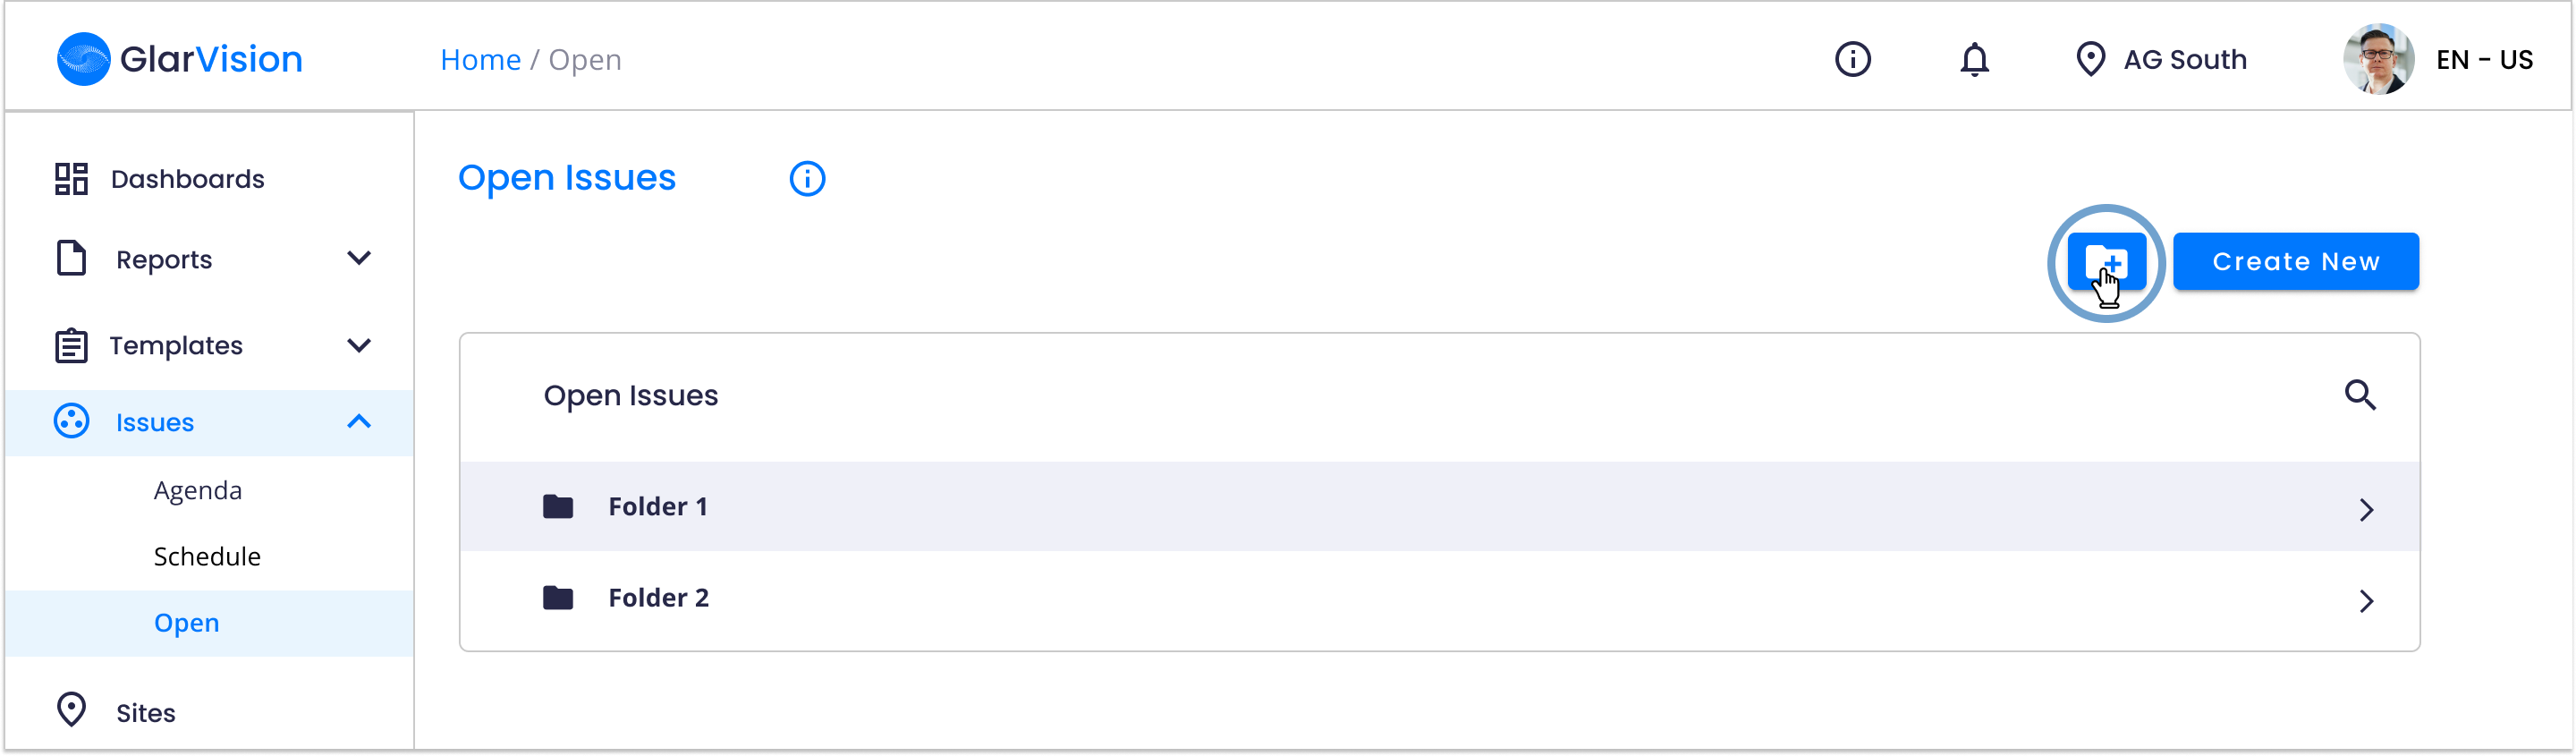
To create an open issue, navigate to the left menu and select "Issues". Then click on "Open". After selecting the option, the folders are displayed.

The issues will appear organized in folders according to the user's needs.

Therefore, at this stage, you must choose and select the folder in which you want to place the open issues or create a new one.
Create an Open Issue
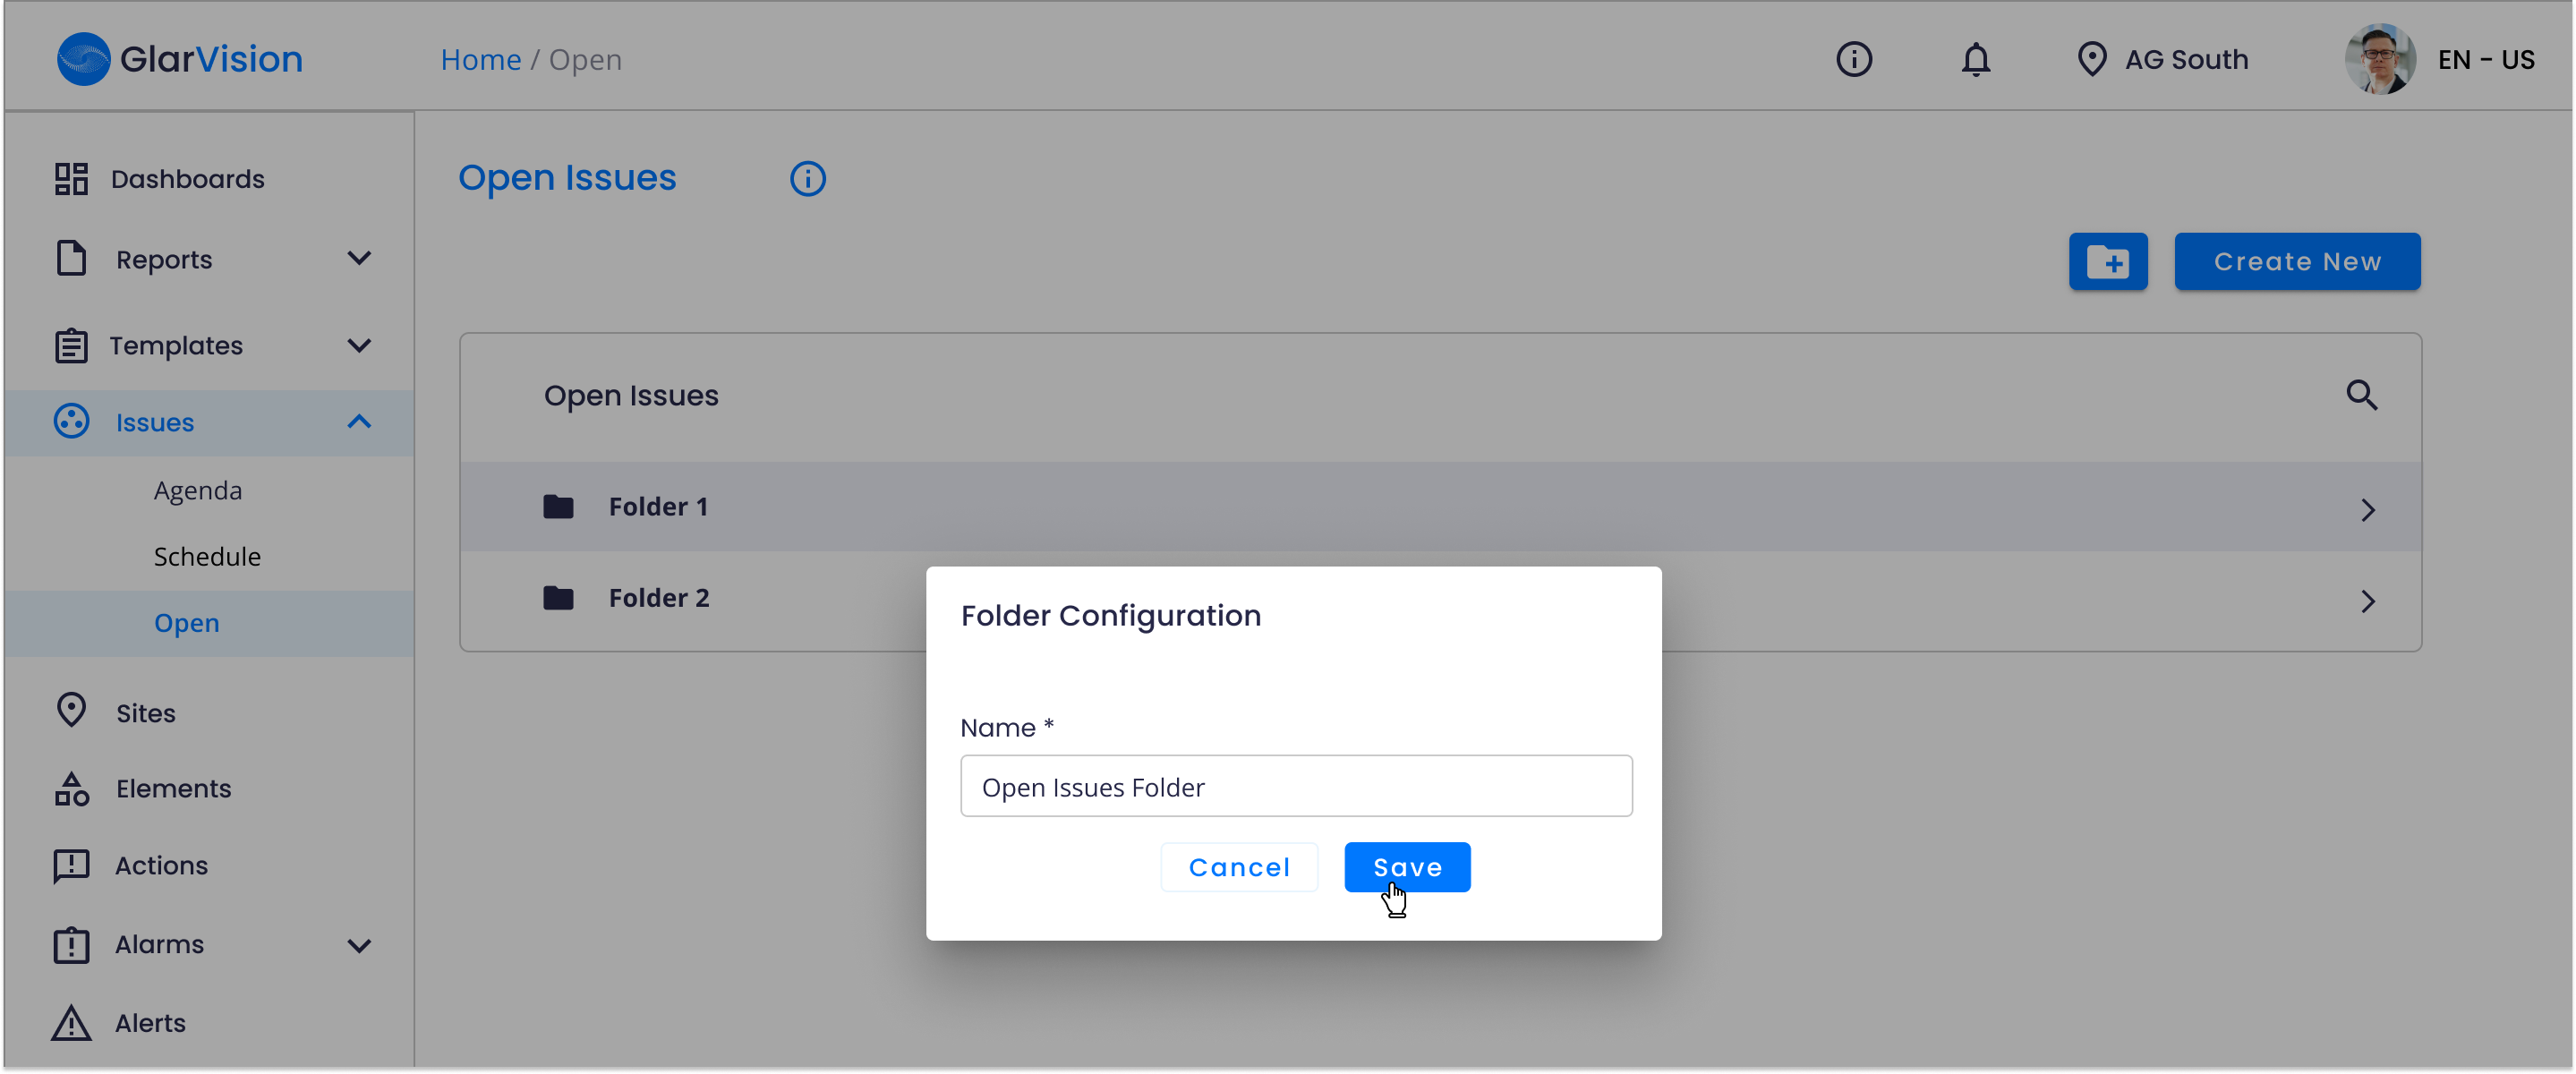
First, the user has to create a folder, and once inside the folder, he can create a new open issue. In order to do that, just lick on the "New Folder" icon, on the superior right corner of the screen.
A window will appear here you can add the new folder name. Then, press the "Save" button.
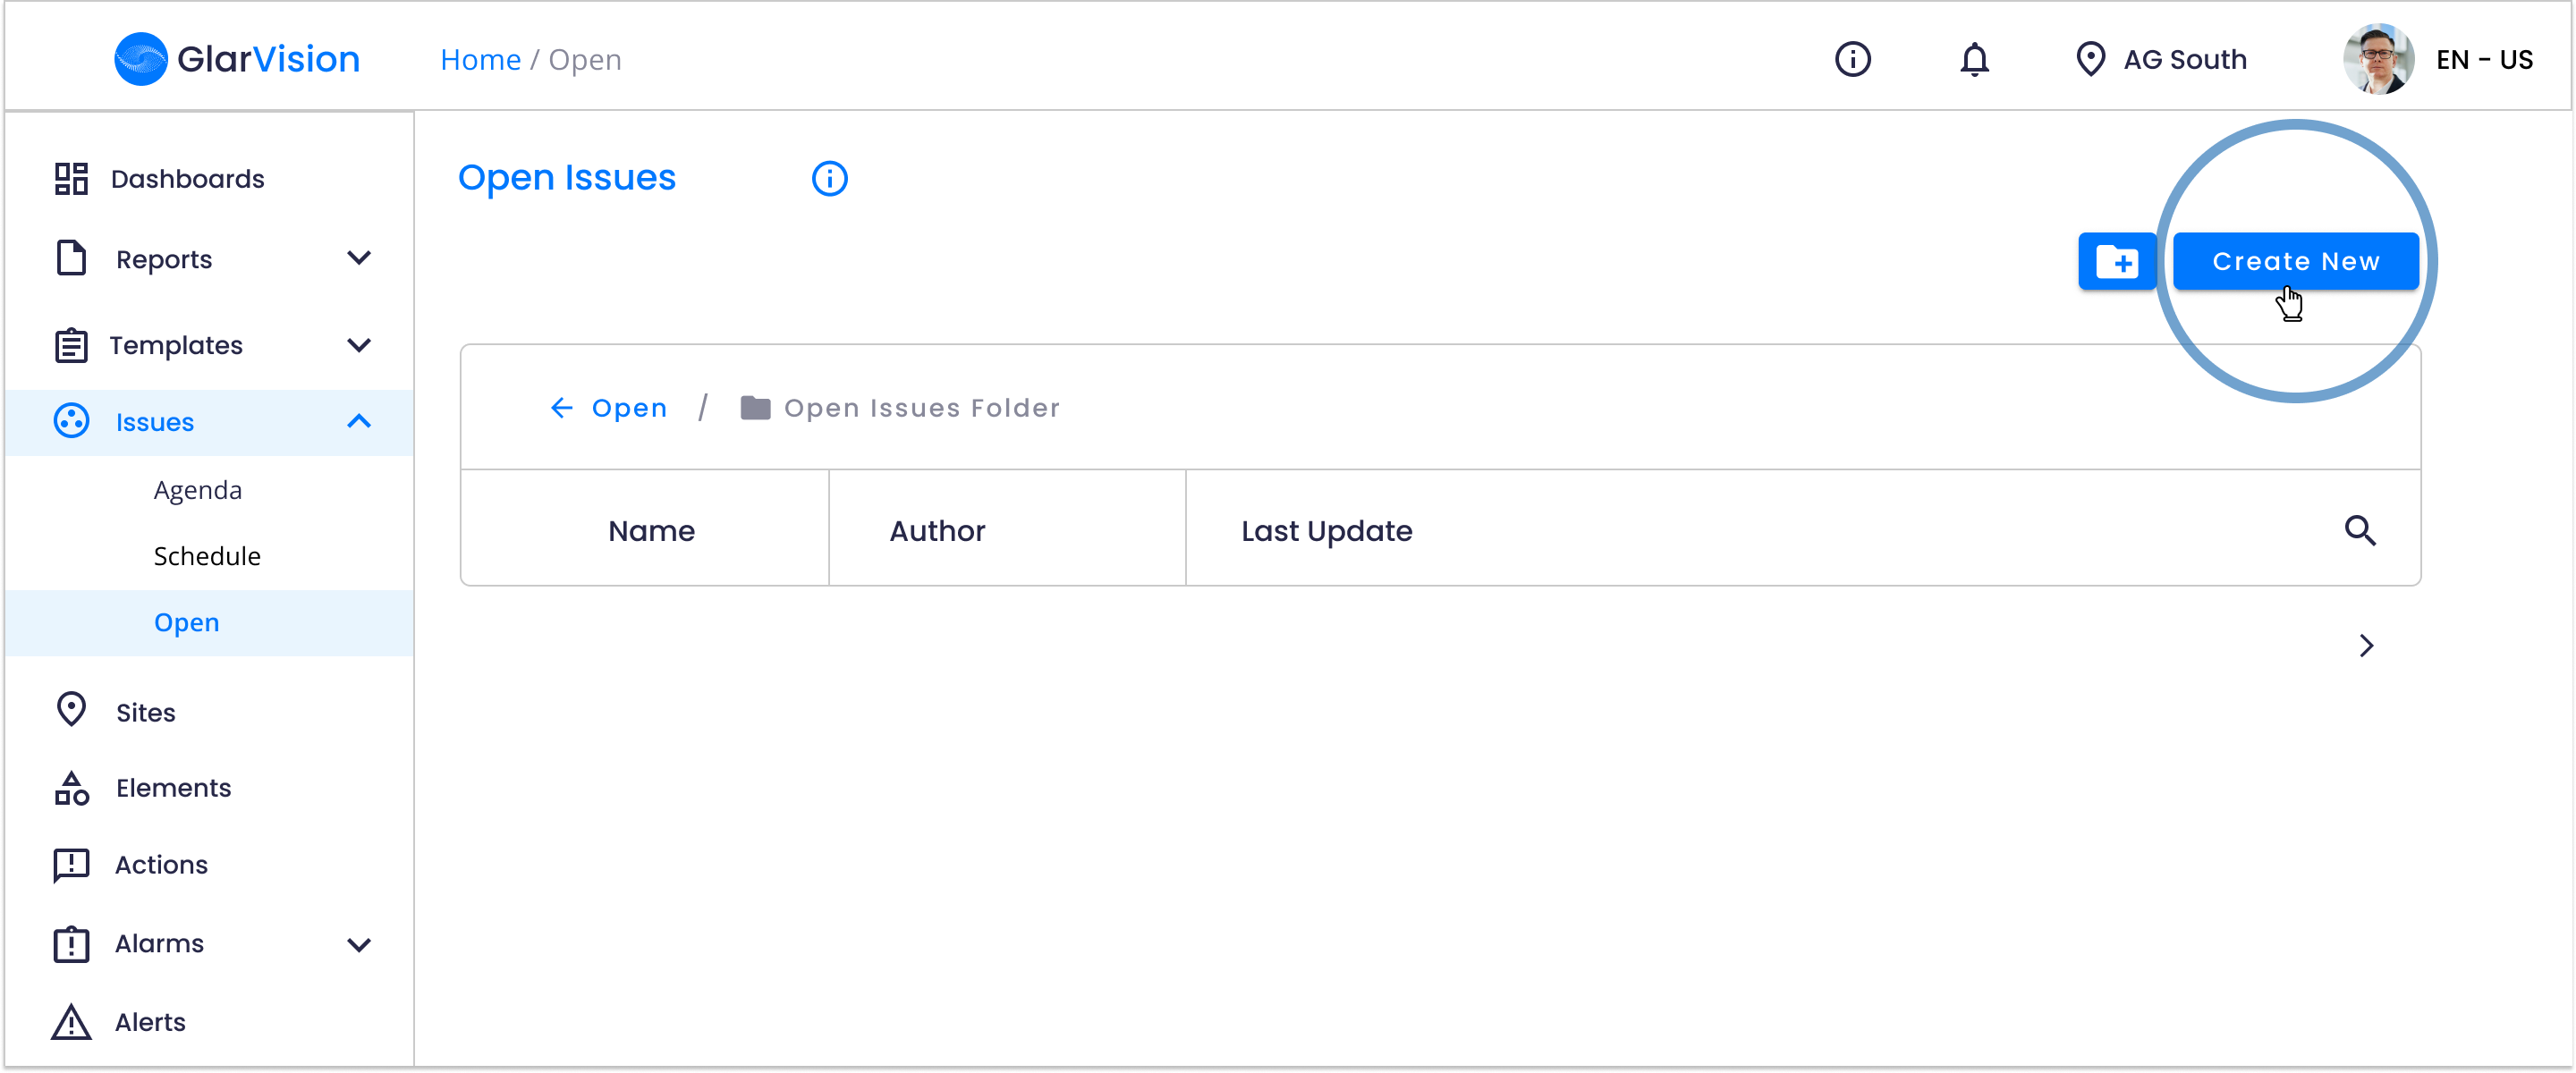
The folder will be created. Click on it. Once inside the folder, the user has to select the “Create” option, to create an open issue.
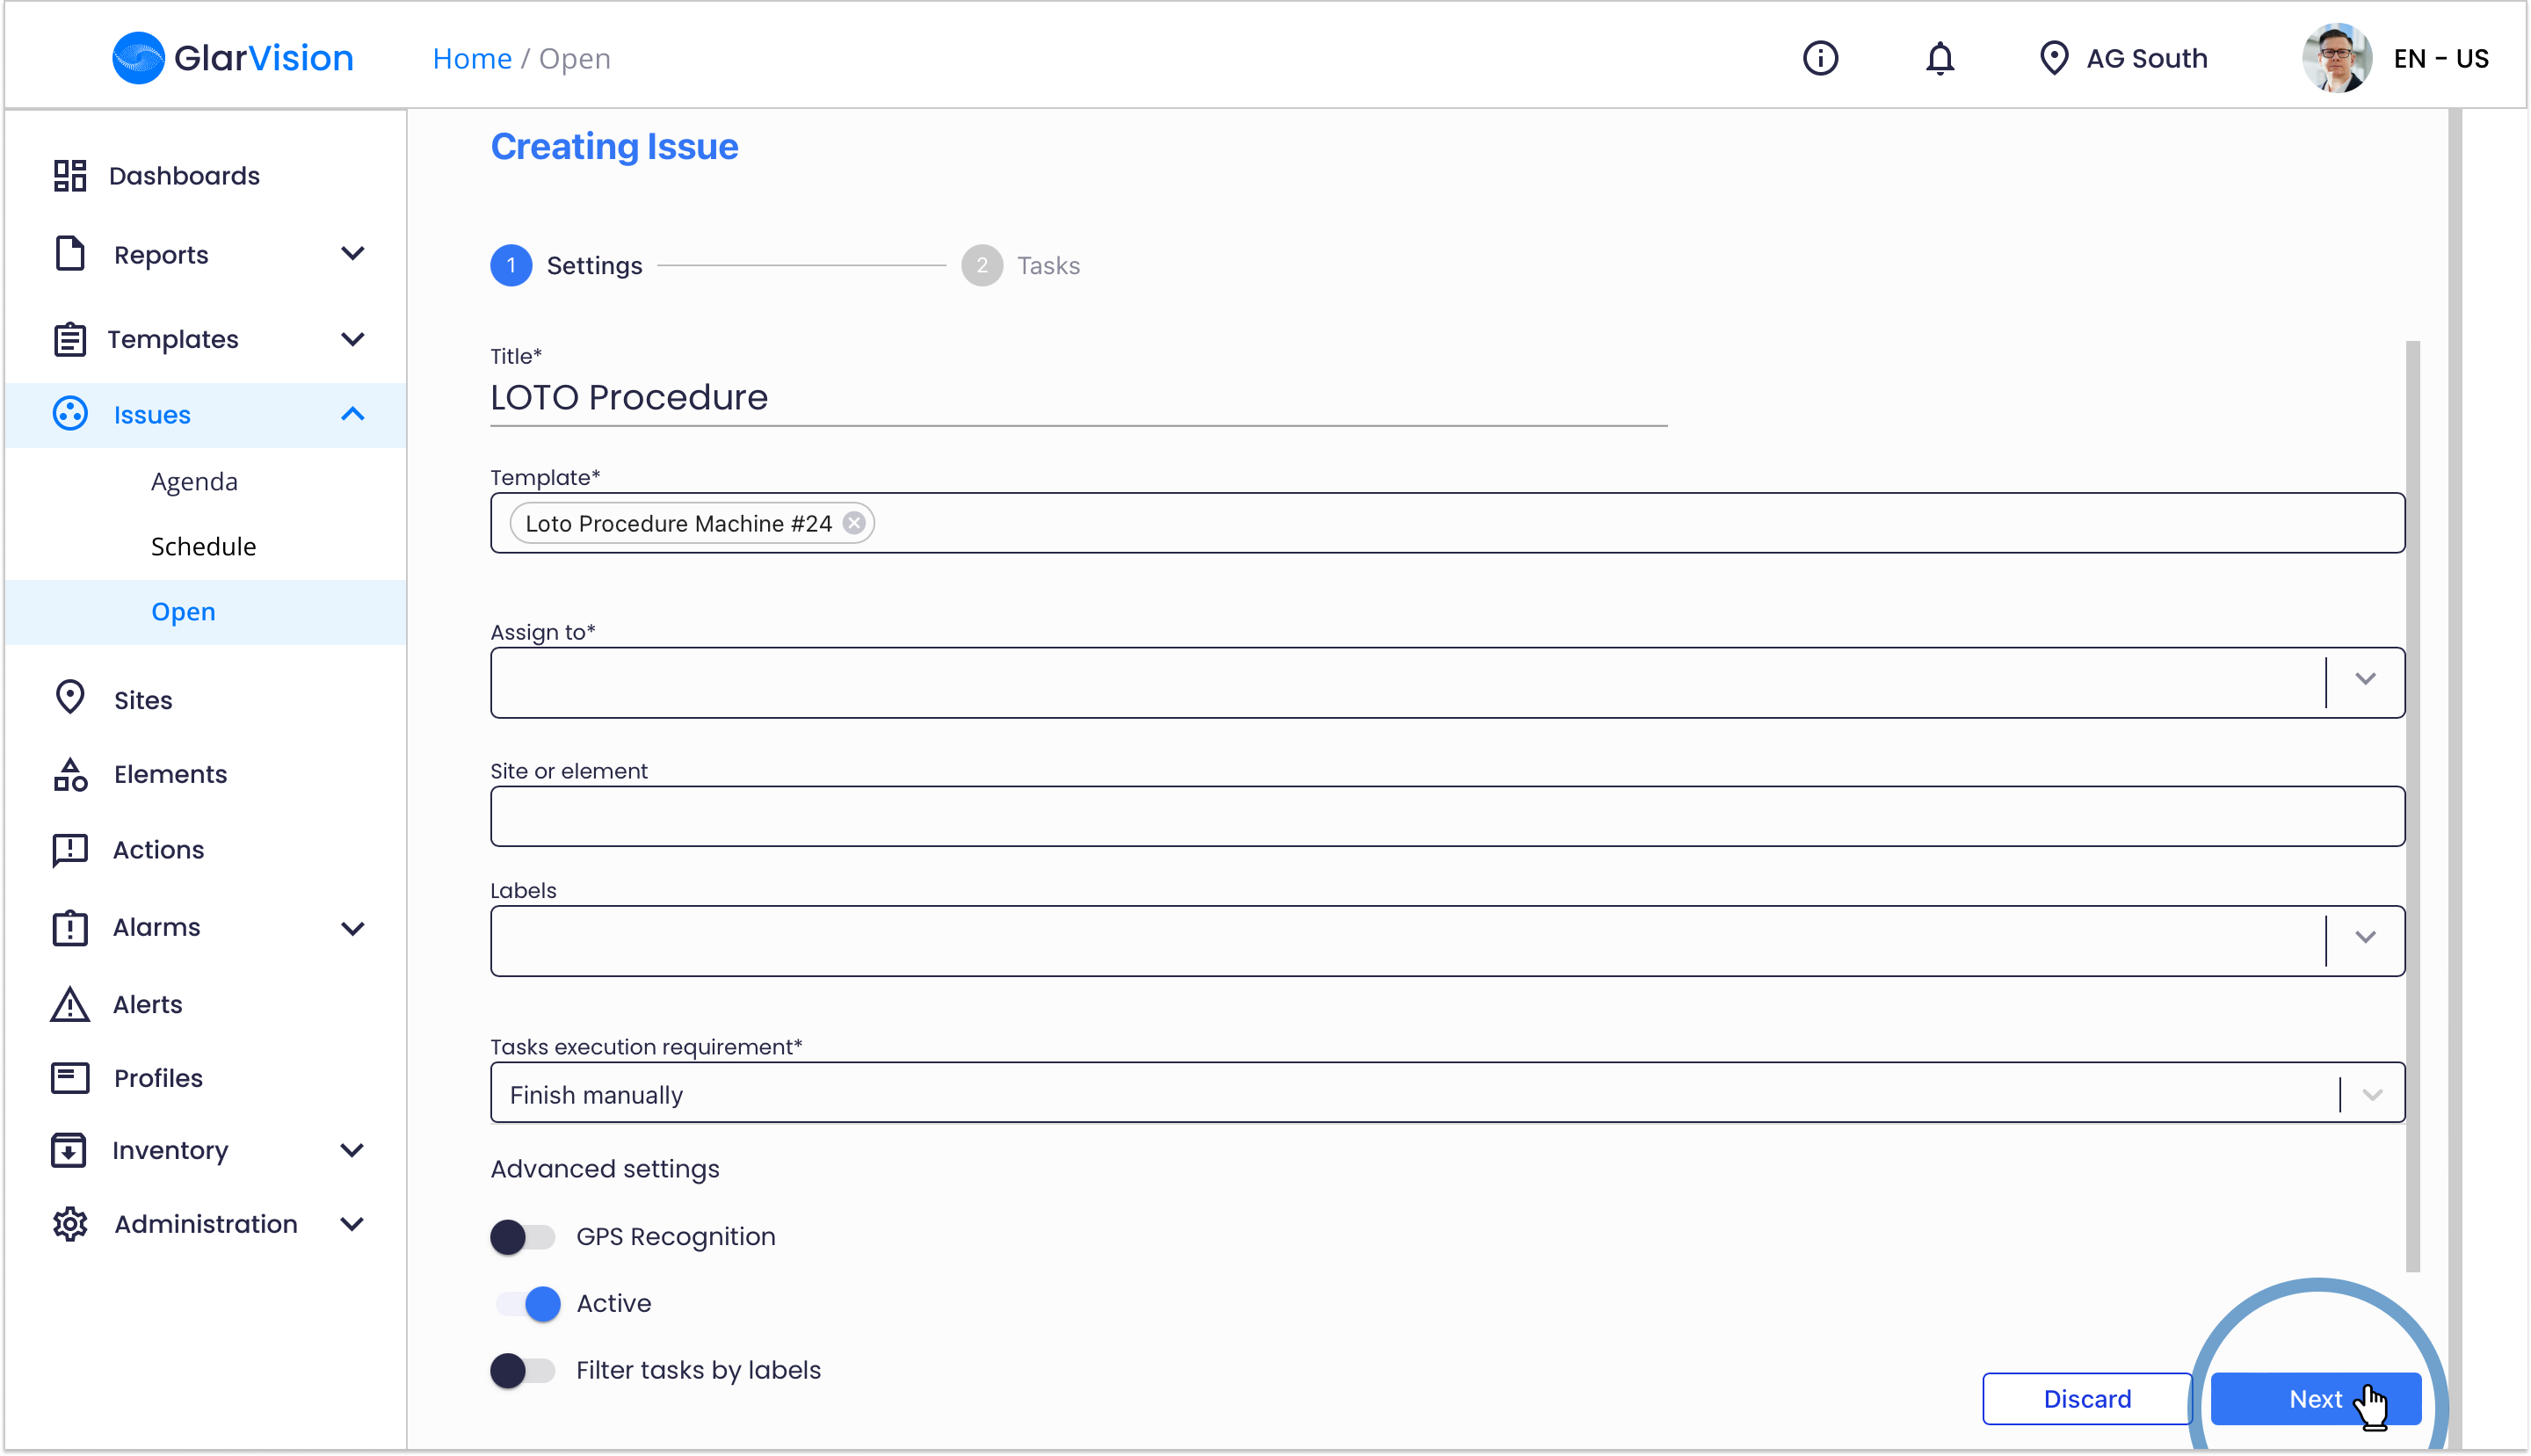
The first step in creating an open issue is choosing the issue name, the template that will be used, and assign a collaborator or field team to it. All this information is mandatory. In addition you can add labels to organize the issue, and include mandatory requirements for the proper execution of the issue.
Note: With the exception of the scheduling configuration, open issues have the same fields to fill in as scheduled issues.
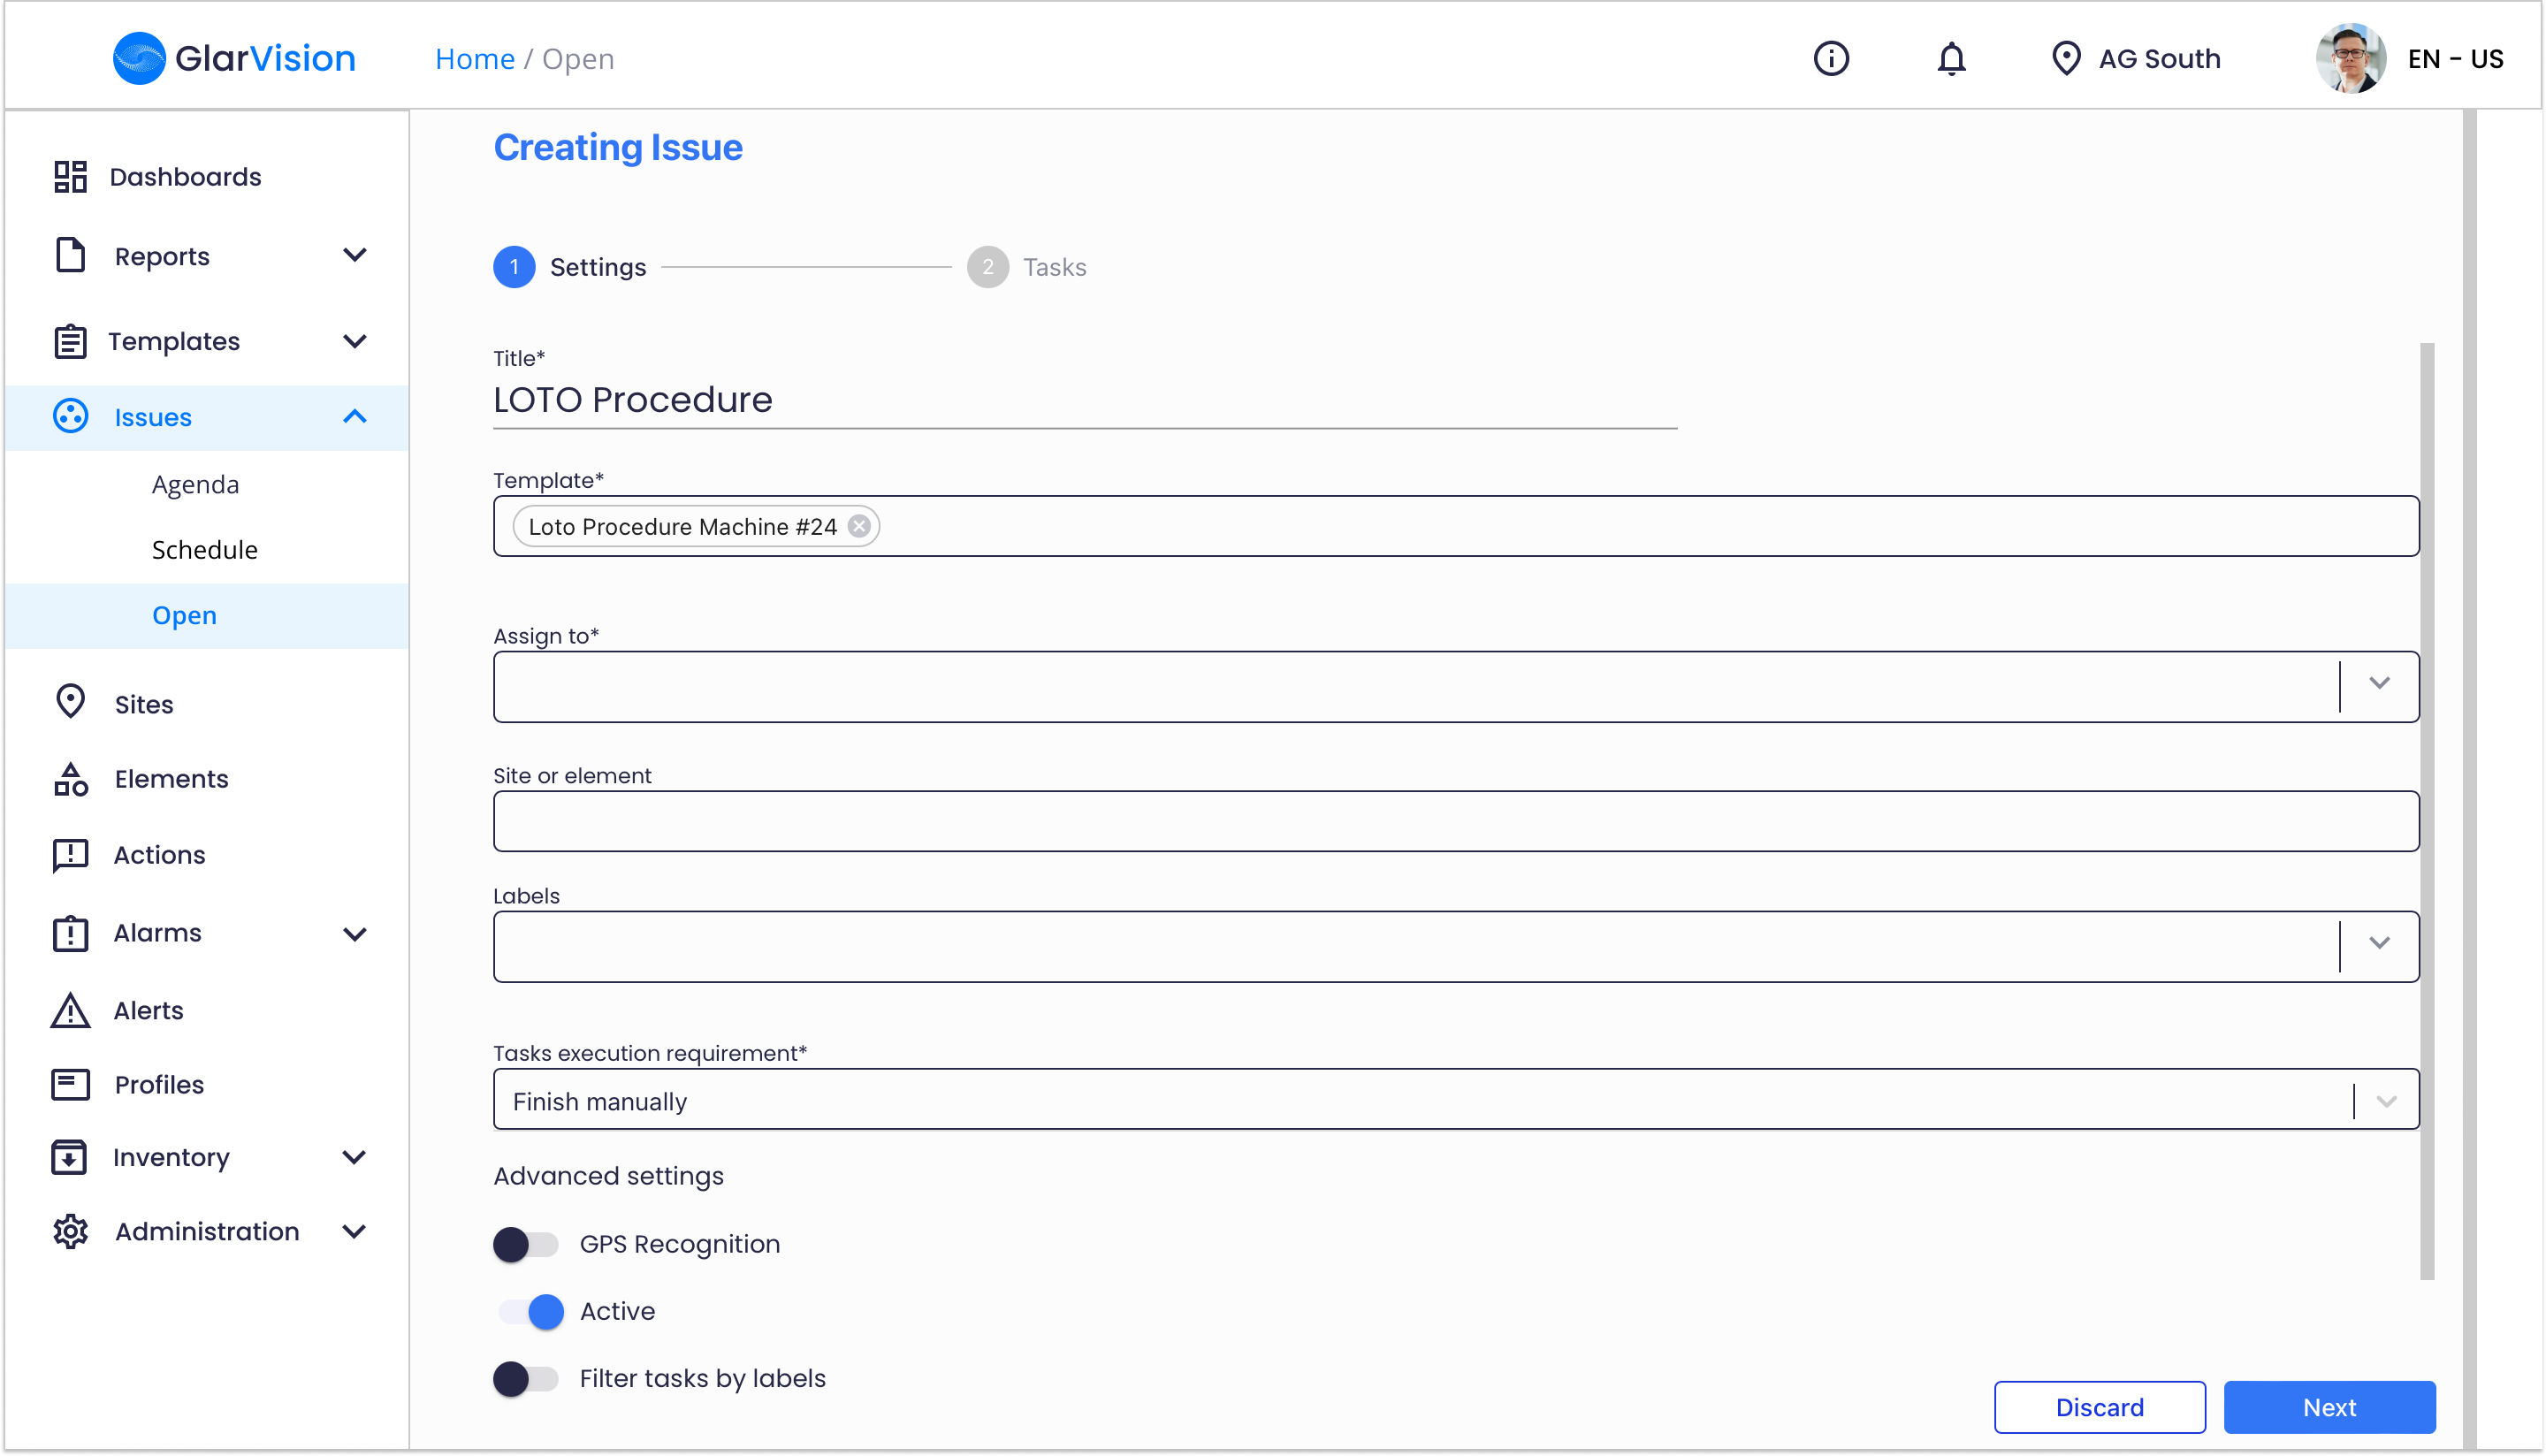
Finally, is also possible to configure some advanced process settings, which may or may not be active. These settings are:
- GPS recognition
- Active/Not active
- Filter tasks by label
- Responsible for process approval
- Ask for description when starting issue
After complete all the inputs required in the settings step, select “Next” to advance to the second configuration step.
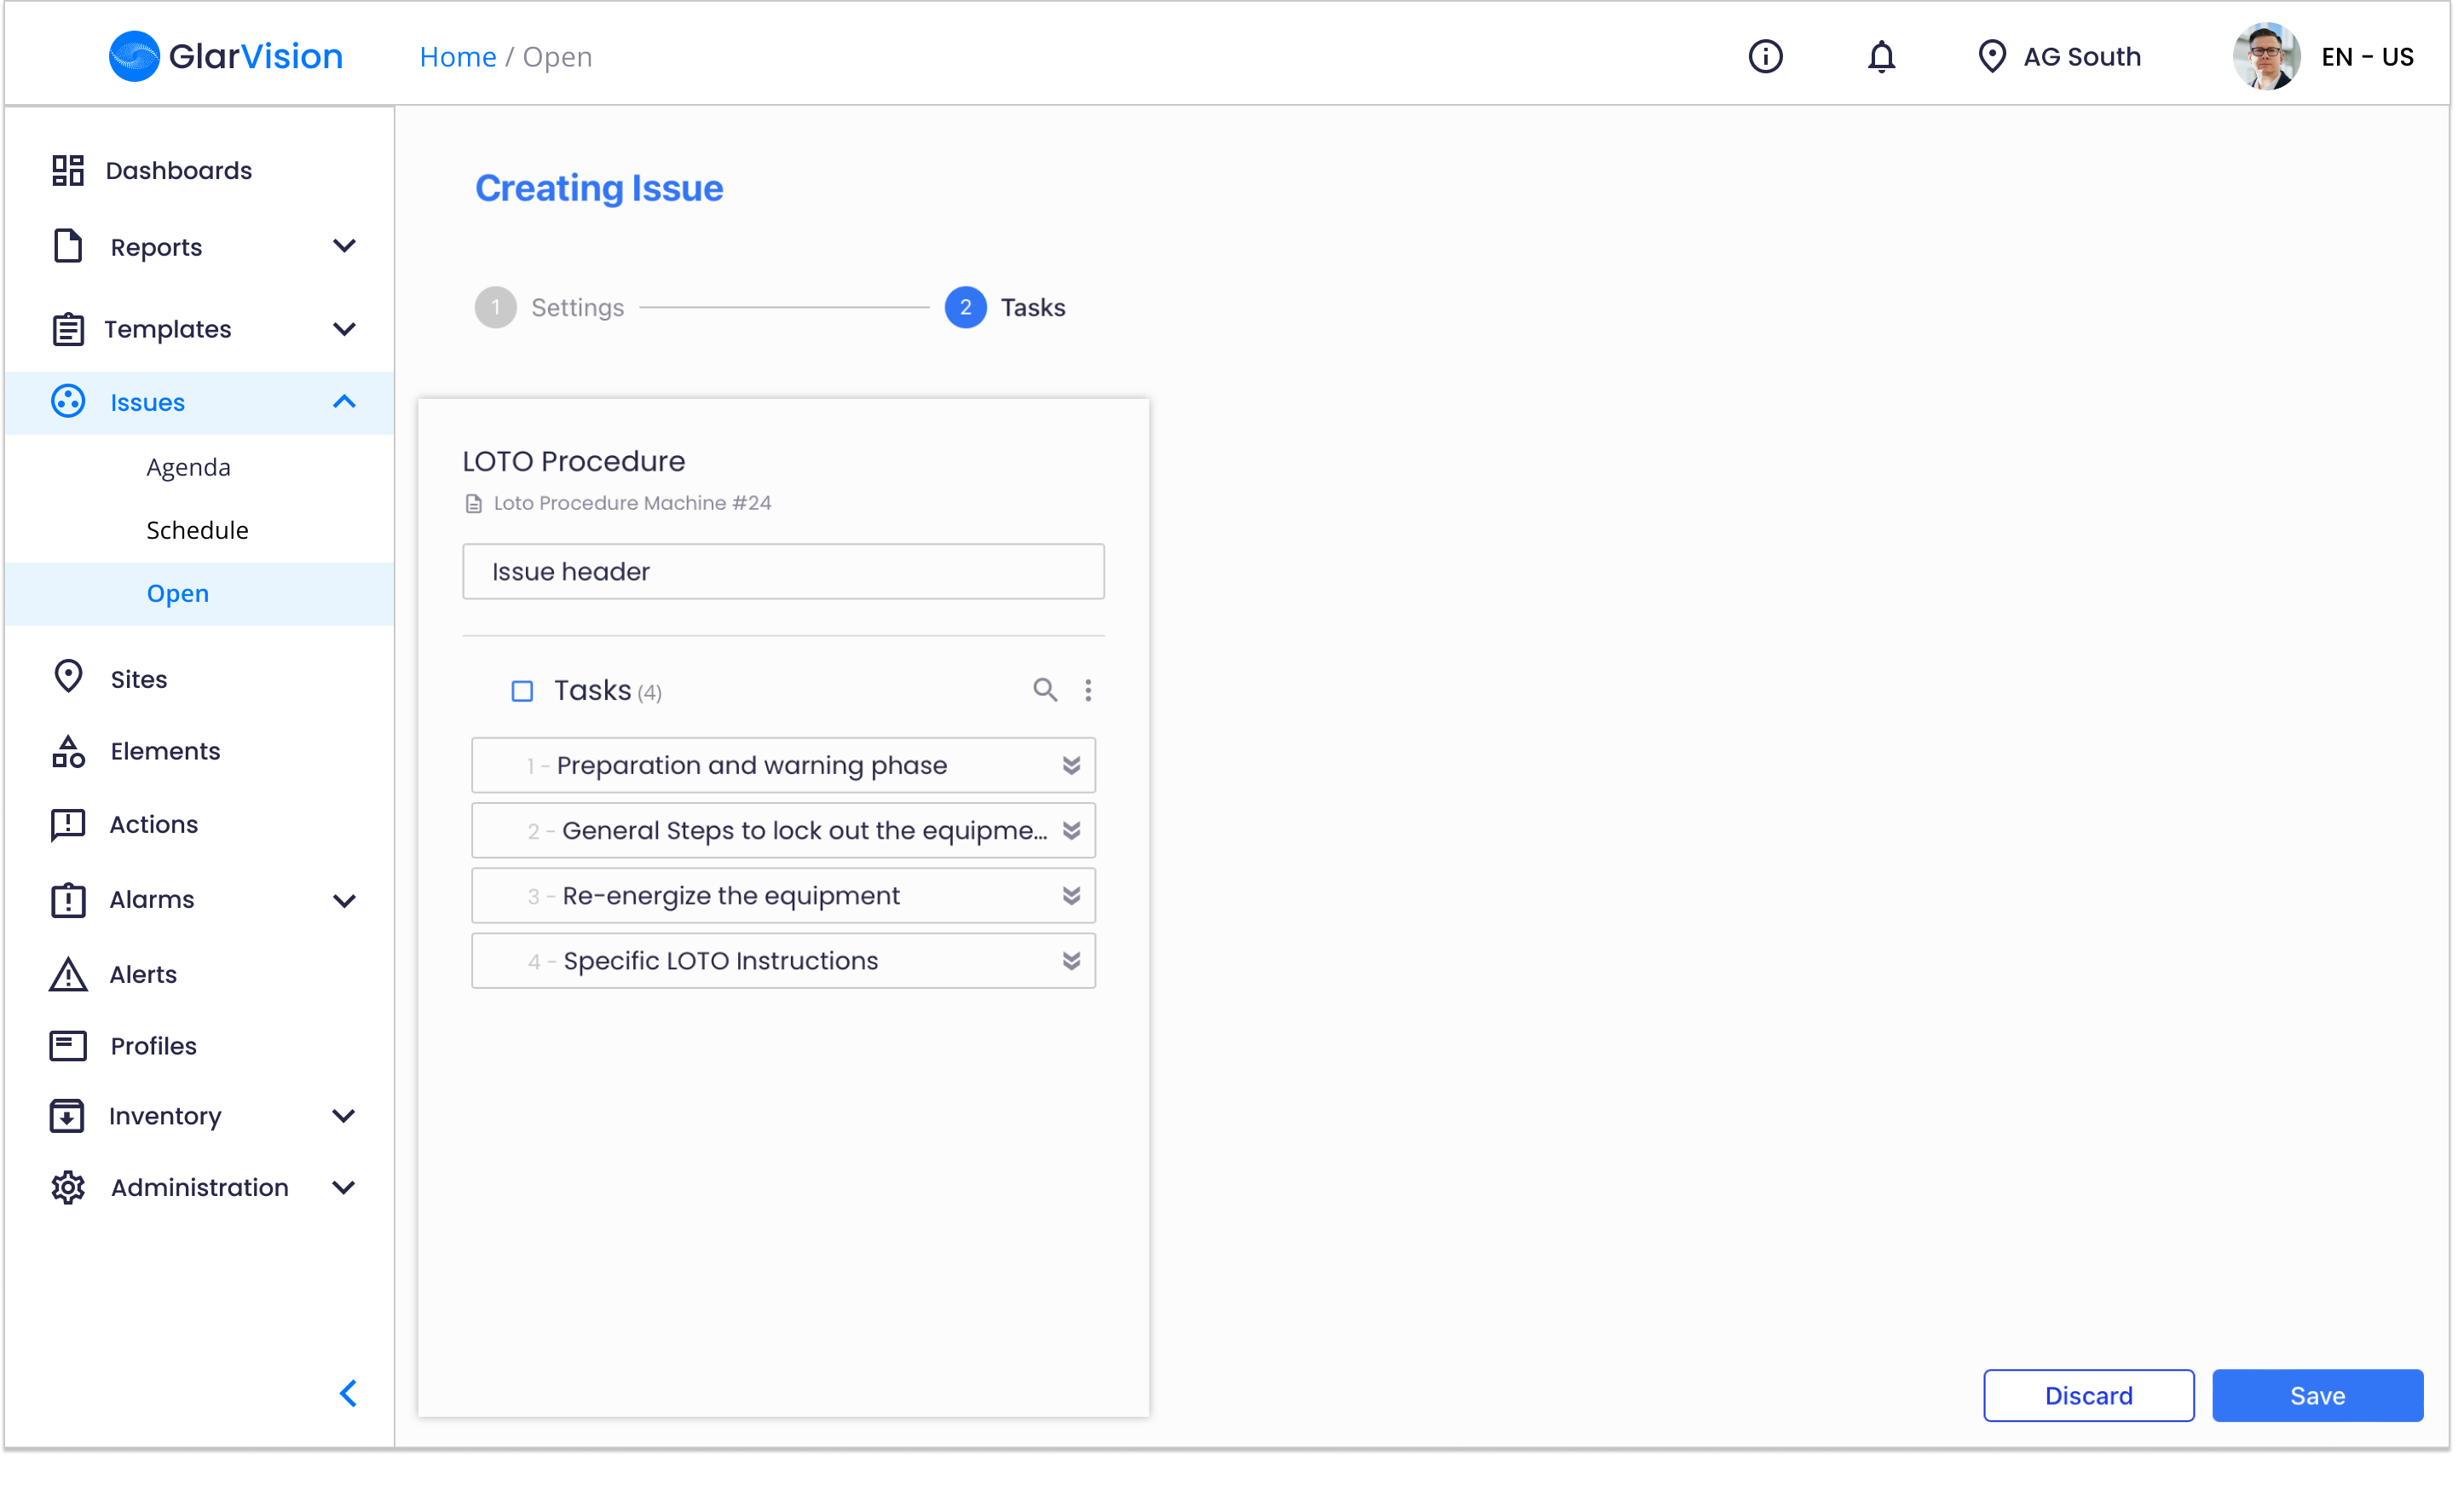
Here, you going to have a preview of the tasks that are in the issue.
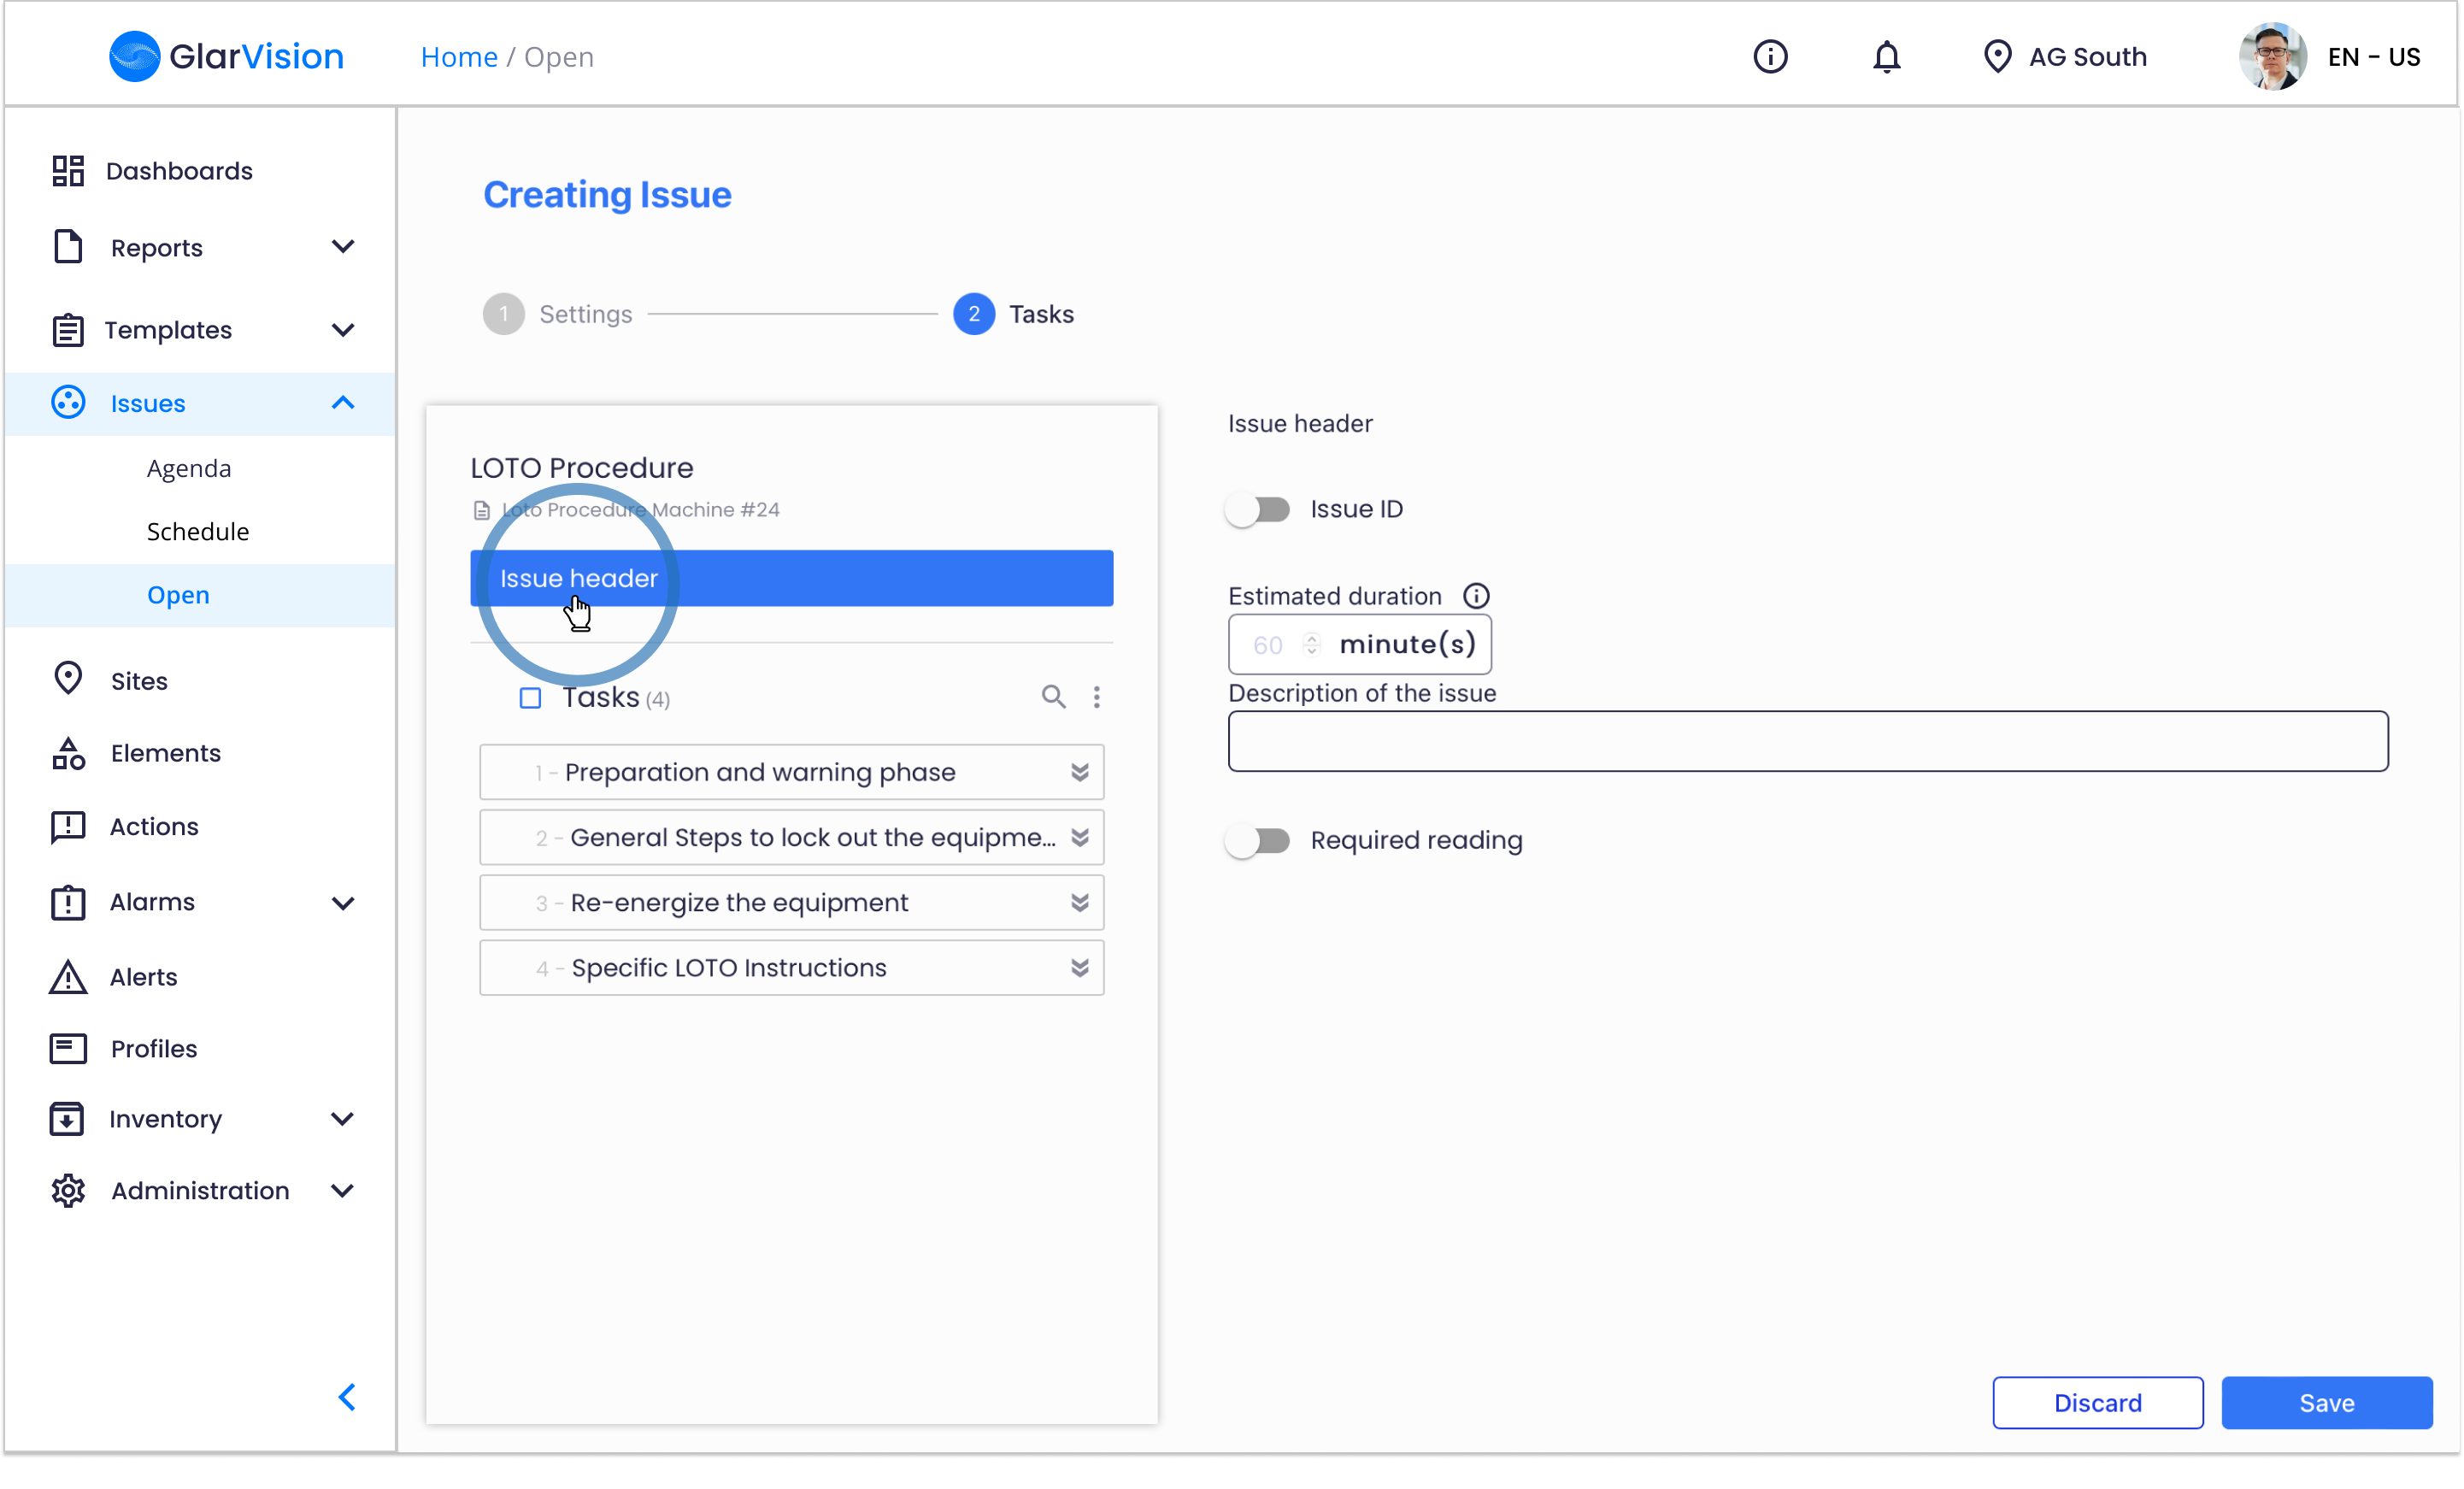
Selecting the “Issue Header”, you will have access to more issue settings:
- Issue ID - Switch on the issue ID in order to define a session ID.
- Estimated duration - Define a estimated duration for that specific issue
- Required reading - Make it mandatory to read the issue description before starting it
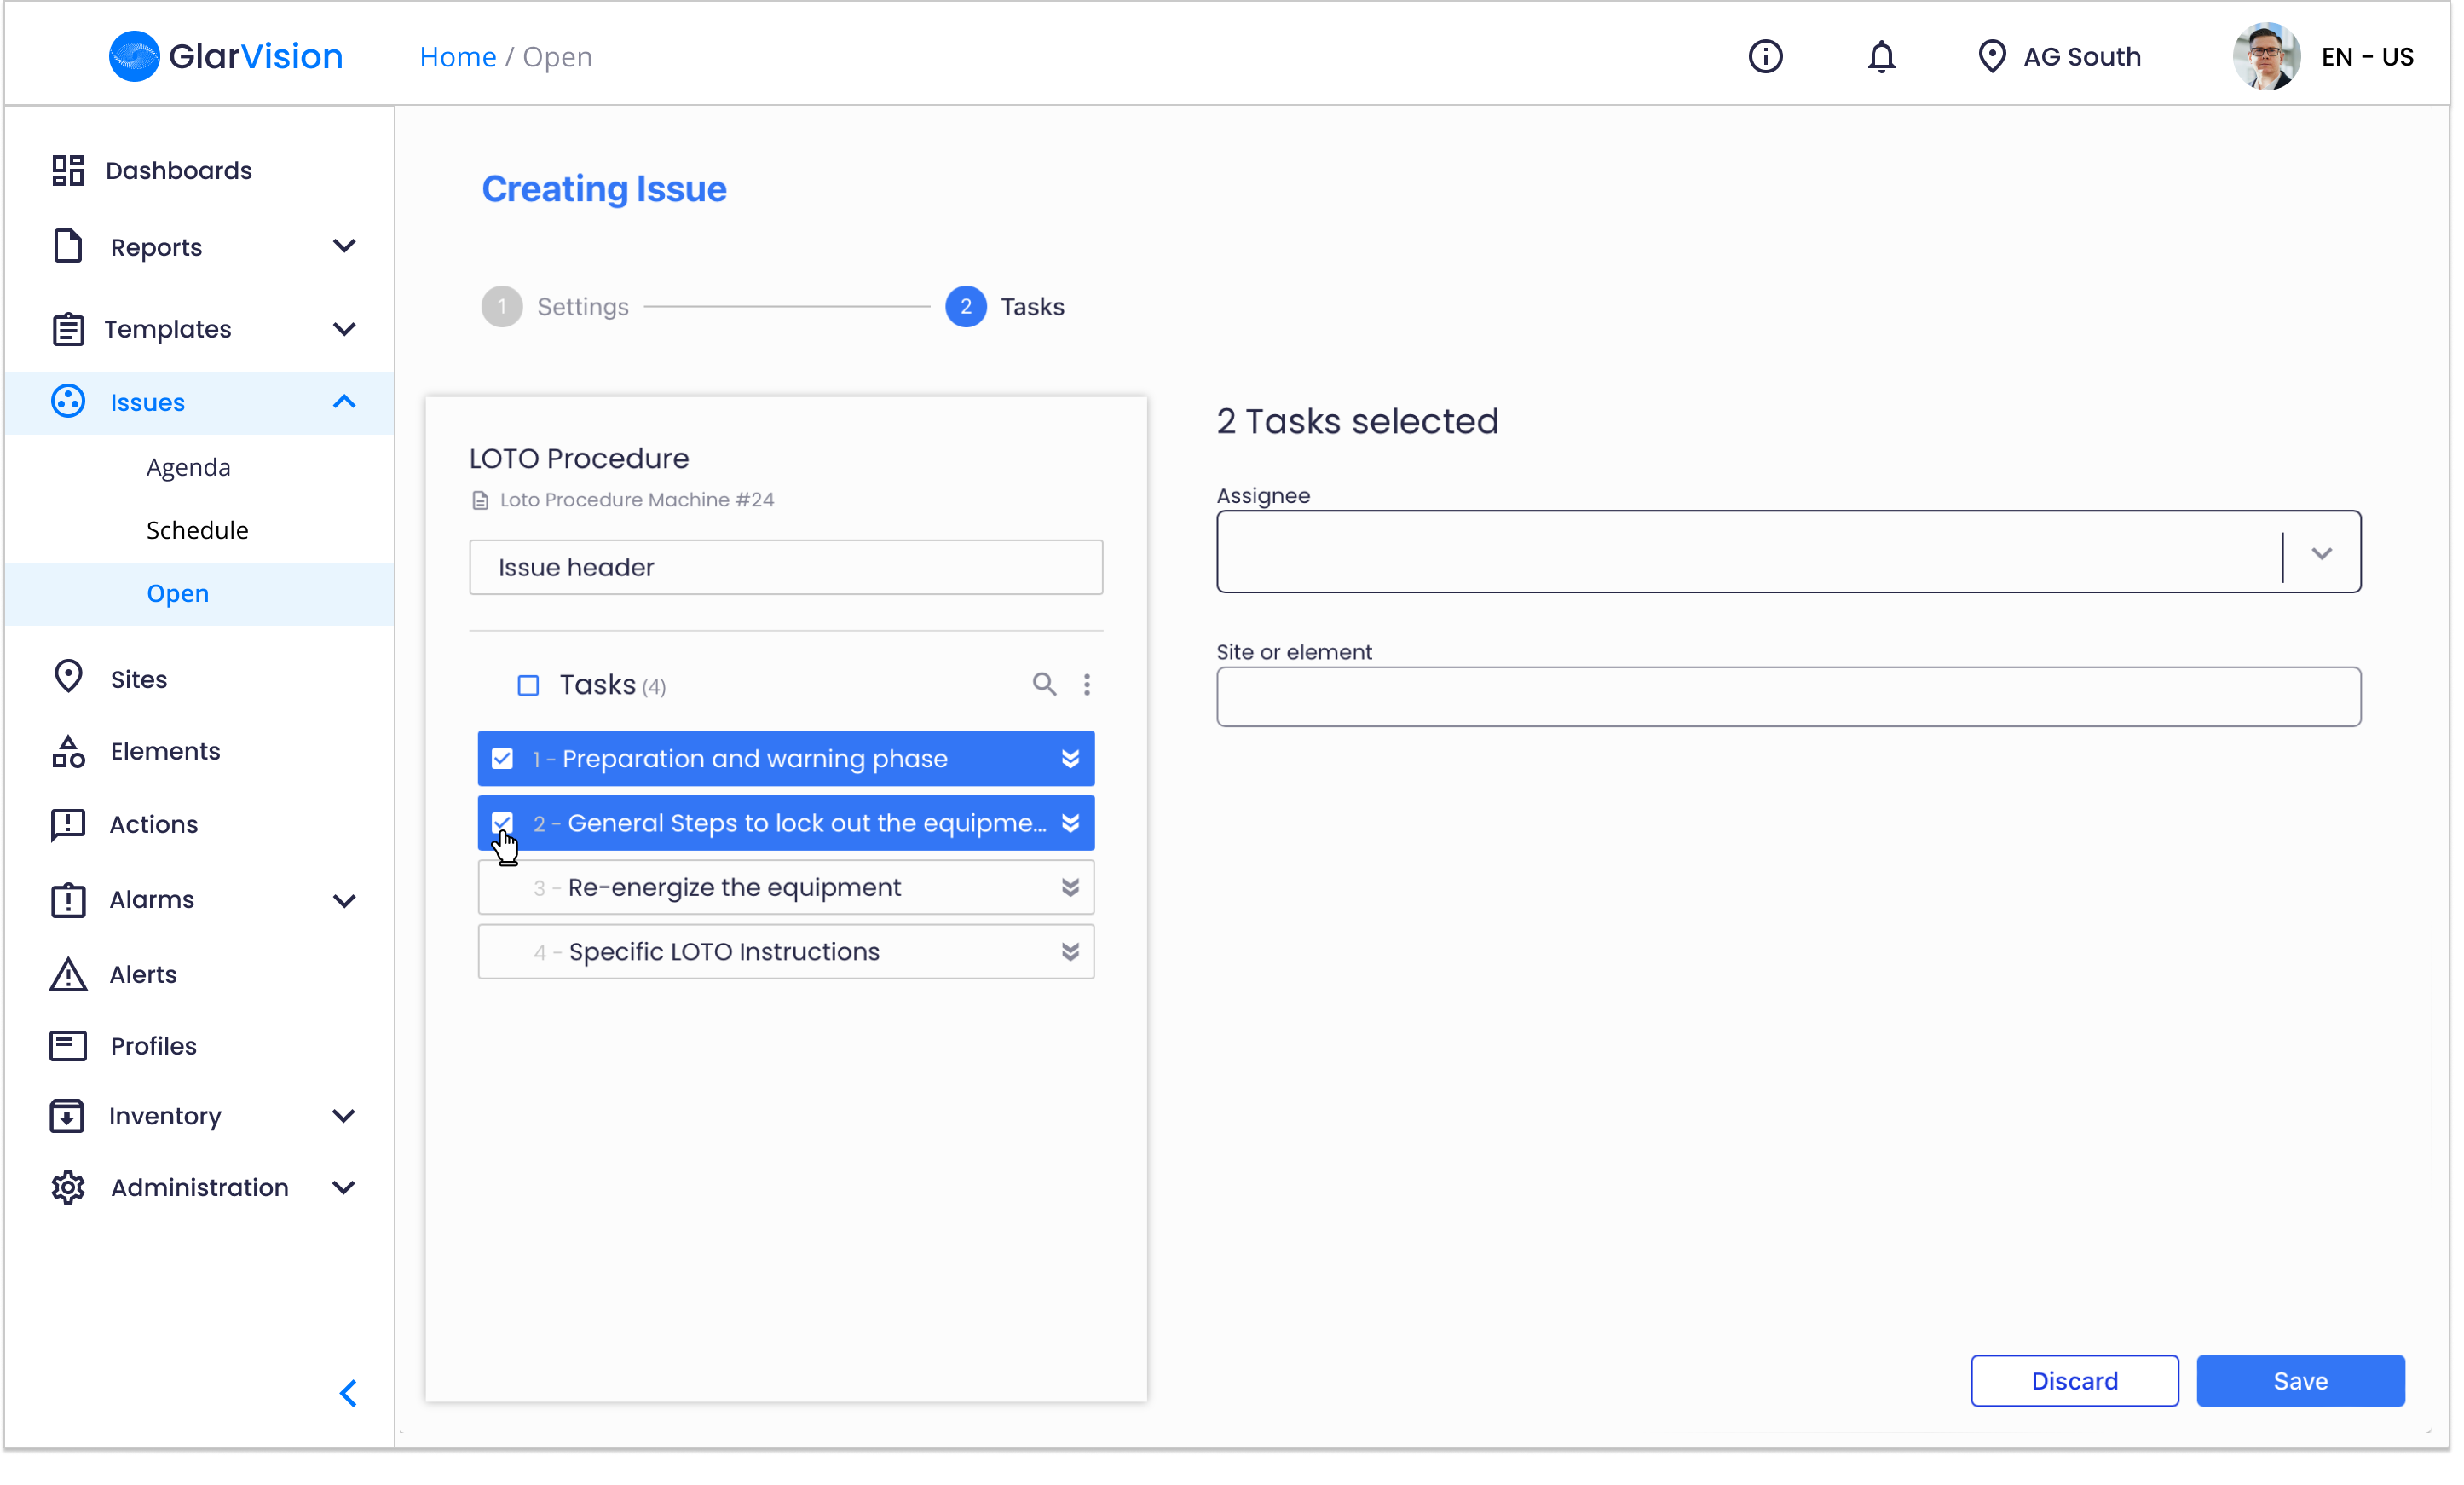
If you want to further personalise your issue you can assign different people or teams to specific issues. Simply select a task or multiple tasks and define the assignee and site or element for those specific tasks.
When you have finished configuring the issue click on the "Save" button in the bottom right corner and the changes made are saved and the open issue is created.
If you have any questions please submit a ticket to request technical support.